Replacing React with Preact in Your Projects
While React is becoming more popular by the day, so are alternatives to the JavaScript framework.
One of these frameworks is Preact, which does not aim to do things that much different per sé, but focuses on performance and bundle size.
This article will take you through the why and how of replacing React with Preact in your existing project.
A bit more about Preact
Preact is the 3kB alternative to React. They strive to provide the same ES6 as React and even provide an extra layer of compatibility with React, which will make most of the React project work as intended out of the box!
This compatibility layer is totally optional for using Preact, but is needed for the purposes of this article.

Even in already existing projects, it’s possible to start using Preact instead of React. For me, this brought instant performance improvements and my bundle size went down significantly.
Show me the code!
To switch to using Preact instead of React you only need to install Preact’s dependencies and adjust your WebPack configuration accordingly.
First, add Preact to your project:
npm install --save preact preact-compatNow adjust your WebPack config to alias react to preact-compat. In webpack.config.js add:
{
  resolve: {
    alias: {
      react: 'preact-compat',
      'react-dom': 'preact-compat',
    },
  },
}
There is a more in-depth explanation of switching to Preact over at Preact’s docs. Give it a read if you don’t use WebPack for instance.
In order to get React Dev-Tools working nicely with Preact, I suggest you include the following snippet in your app’s entry point. At least as it’s before calling ReactDOM.render:
if (module.hot) {
  require('preact/devtools');
}
This will add devtools compatibility when you’re running your app in WebPack’s dev-server mode. If you require the devtools outside of the if-statement it will be included in the production bundle of your app, best avoid that!
And that’s all there is to it!
But, why switch?
There are many possible reasons one would choose to switch from using React, but the one I’ve been hearing a lot as of late is people having concerns around React’s license.
I can imagine people don’t want to be dependent on big software companies like Facebook or Google for their projects. Luckily, Preact has the MIT license.
Performance and size
While React is super fast on its own, Preact delivers an even faster experience. In my case, I couldn’t really tell much of a difference in the beginning, but I noticed Preact executed some bindings a bit differently. This made my components mount earlier than in React. Nice.
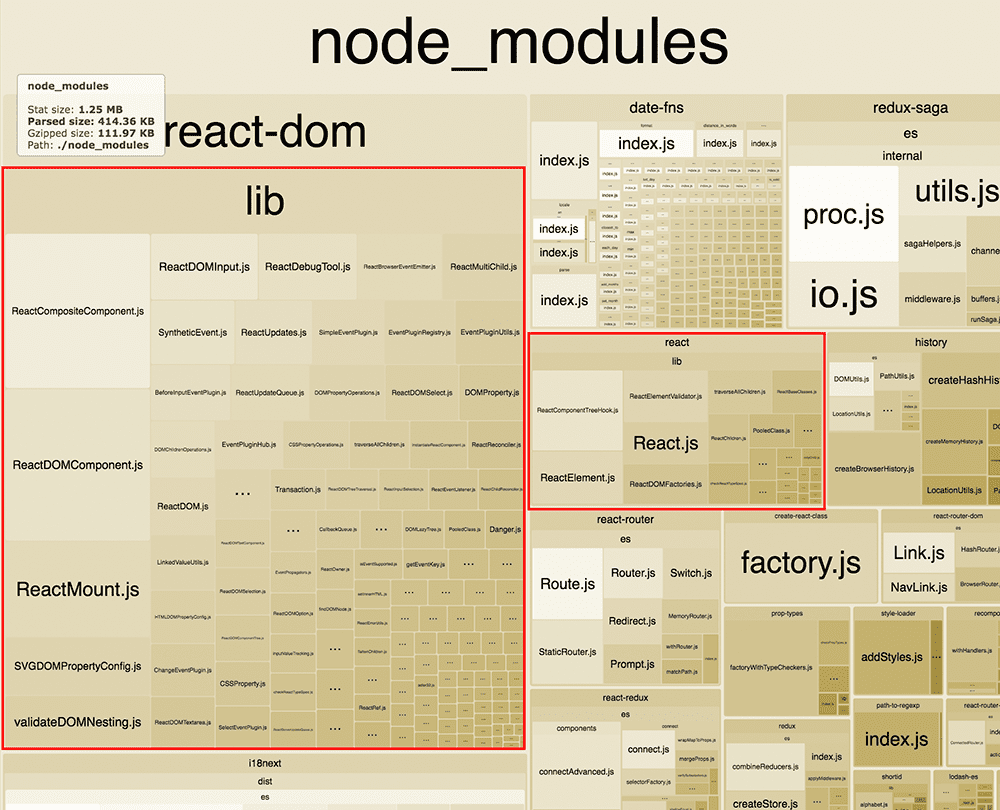
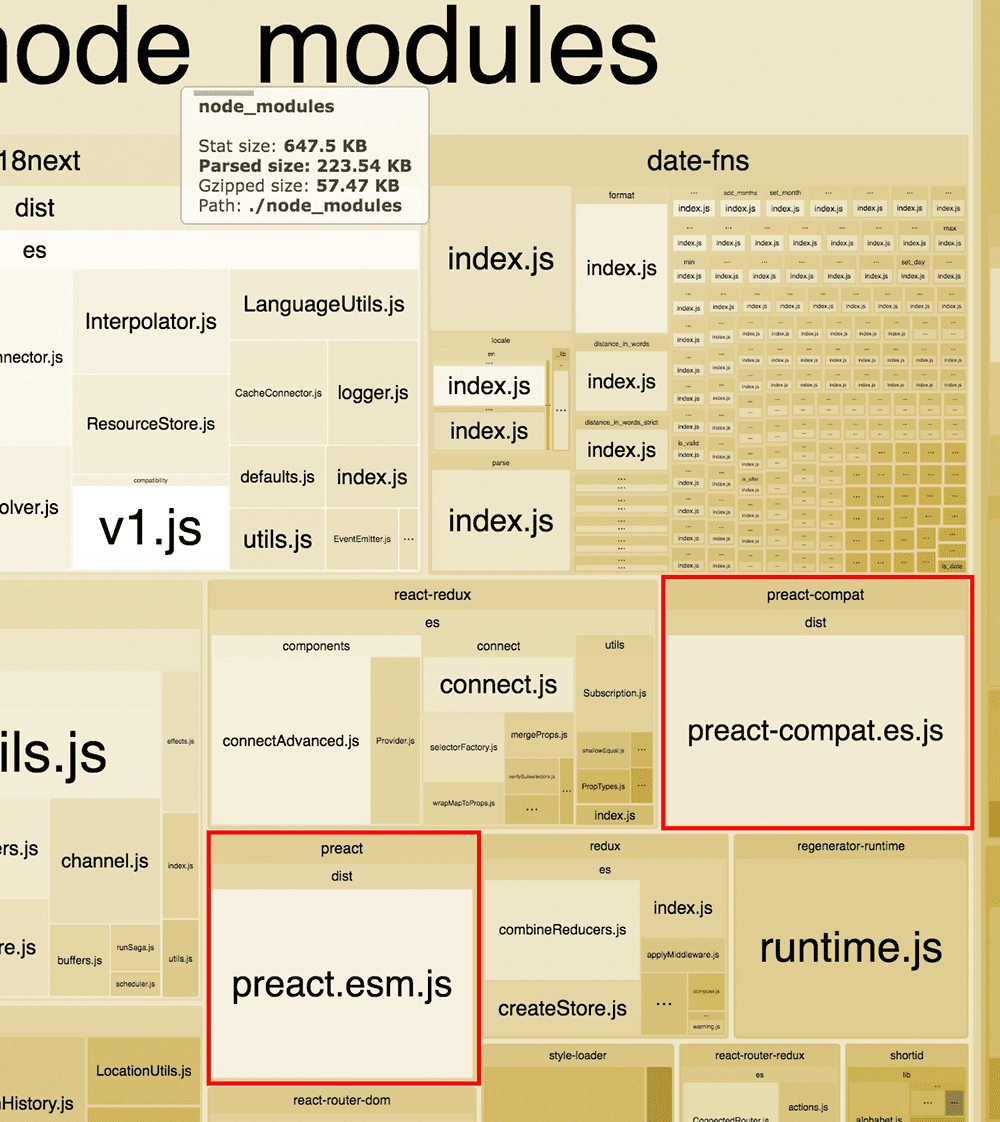
The biggest difference was in the size of the bundle. Using webpack-bundle-analyzer I compared the two bundles which were built with WebPack. Both cases used the --optimize-minimize flag to ensure they both got minified in the process.
Bundle with React

Bundle with Preact

Look at the difference compared to the other libraries living in the bundle! I was amazed by the decrease in size I was able to get.
The bundle went from 111.97KB gzipped to 57.47KB gzipped. That’s a whooping 54.5KB less.
Compatibility with other libraries and IDEs
The great thing about preact-compat is, is that it also provides compatibility with popular libraries you might already use in your project. For me, react-redux and react-router just worked after I applied the alias technique described earlier. You should test your app thoroughly though.
You could go without this compatibility layer and go plain Preact, but it might require some extra working making your components and 3th party libraries work.
Another thing I really like is how well eslint and flow work with this approach. They’ll still think you’re using React, which certain rules in eslint can check for.
When I added Preact as a standalone earlier in the project I couldn’t get eslint to stop telling me to include React in JSX files, but I was using Preact for that. Aliasing solves this.
Another really great win is compatibility with the IDE I use most: WebStorm. Same as for eslint it will still consider import React from 'react'; to be just React, while in truth it’s Preact which get included in your bundle in the end.
Jason Miller, the author of the library, reached out to me to tell that if you’re running a plain Preact without preact-compat setup you can also get these benefits by aliasing react to preact in your WebPack config. So that’s a pro-tip there!
Wrapping up
Hopefully, I got you excited to try and apply Preact to your current projects. It’s not too much work and you don’t actually need to adjust your code base, so that’s awesome.
Feel free to reach out if you have any questions!