Text with Moving Backgrounds with jQuery
Personally, I am a huge fan of negative space in design. This got me thinking while I was trying to accomplish something different. Normally a textual caption would be positioned above a background, but I wanted to do it the other way around: place the background in the letters.
I also wanted to add some nice dynamic effects to enhance the effect. This was amazingly easy to accomplish in jQuery with the use of a little creativity.
This article will explain what you need to do create an effect like this yourself.
What are we going to do?
We are going to create a container which has a moving background, but only a set of letters will be visible of the background. It will be as if there are holes in your container.
To do this we need just a few things:
- A nice background pattern or image
- Letters punched out of an image
- Just a little jQuery code
Normally you would create a PNG file containing anti-aliased letters and place it inside some container on top of a background. What we are going to do is place a full image over a background, covering parts that shouldn’t be seen. Just like a mask!
Then we’re going to make the background of the container move around to create a nice looking effect.
Step 1: Creating the “mask”
To create the overlaying mask I am going to use Photoshop. You can do this with any other image manipulation application, but I am going to explain what I did using screenshots of Photoshop.
- *First create a new image and fill the background with the foreground of the mask. *This is the part that will be visible for the users. I used a black solid fill for this, so it stays clean.
- Create a new text layer on the fill you just made.
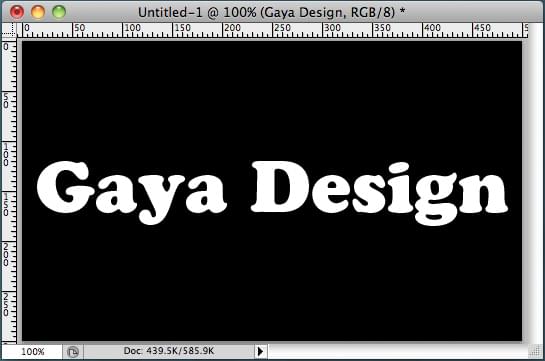
This gives us the right impression, and we just have to imagine that the white letters will be punched out later. - Hold CMD / CTRL and click on the text layer icon
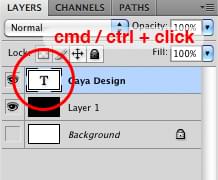
Doing this the text will get a selection around it which should look like this: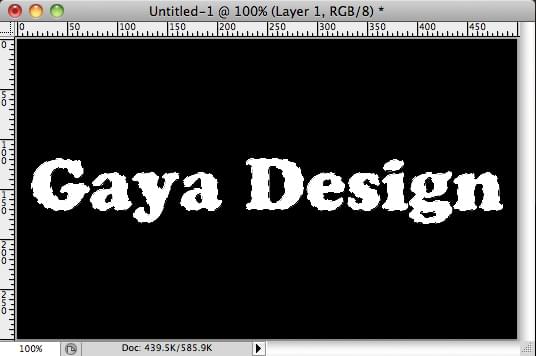
- Click: Select > Inverse
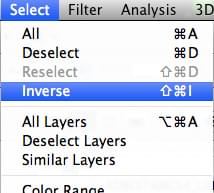
Now the area that will be visible on the mask image is selected. It will look like this: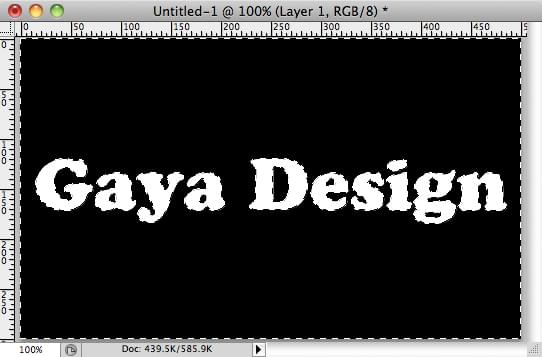
- Select the fill layer and click on “Add mask”
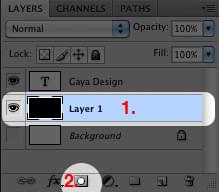
This will create a mask for the fill and the letters have been punched out. - Hide the text layer
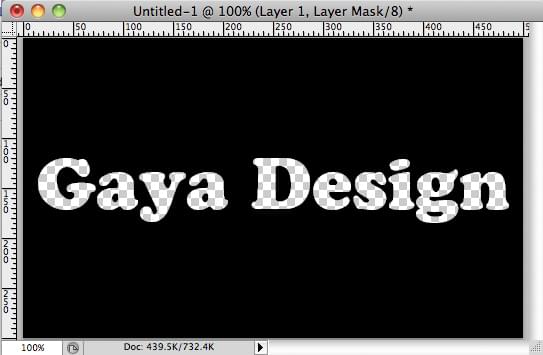
You have now punched out the letters of the fill! - Save as .png!
PNG handles transparency very well and looks right in almost all current browsers (nope, not IE6). It also support opacity per pixel, so it’s not like the the GIF transparency.
Step 2: A little documenting and styling
Now that you’ve got your own mask image, it’s time to create the HTML page for it to end up in.
Just for basics, use something like this:
<html xmlns="http://www.w3.org/1999/xhtml" xml:lang="nl" lang="nl">
<head>
<meta http-equiv="content-type" content="text/html; charset=UTF-8">
<title>Some title</title>
<link rel="stylesheet" type="text/css" href="style.css">
<script type="text/javascript" src="http://ajax.googleapis.com/ajax/libs/jquery/1.3.2/jquery.min.js"></script>
</head>
<body>
<div class='scrollBg'>
<img src='overlay.png' alt='' />
</div>
</body>
</html>We created a simple HTML page containing just two elements; the container “scrollBg” and the image that serves as the mask.
Make sure to fix the src of the image and the href to your stylesheet.
In the stylesheet we just need a little bit of styling:
body {
    background-color: #000000;
}

.scrollBg {
    background-image: url(background.jpg);
    background-color: #000000;
    width: 487px;
    height: 83px;
}

.scrollBg img {
    display: block;
}
You’ll have to fix the width and height of the scrollBg container. Adjust it to the width and height of the mask you created. This will prevent the background image from showing outside of the mask.
Also change the URL of the background image.
Step 3: Go jQuery crazy!
In the Javascript part of this tutorial we are going to make the background image shift in position at random.
To make jQuery able to move the background image, we need a plugin, since it’s not in the default behavior.
Go download this plugin: http://plugins.jquery.com/project/backgroundPosition-Effect
Include this script in on your page using:
<script type="text/javascript" src="url_to_moving_background.js"></script>Now we can use backgroundPosition as a parameter in the jQuery animate effect! Pretty neat!
The following jQuery code will move the background around at random (put it in the part of the HTML page):
<script type="text/javascript">
$(document).ready(function() {

    moveBgAround();

});

function moveBgAround() {
    //give a random value from 0 to 400 for the X axis and the Y axis
    var x = Math.floor(Math.random()*401);
    var y = Math.floor(Math.random()*401);

    //random generated time it takes to move
    var time = Math.floor(Math.random()*1001) + 2000;

    //make the background image move!
    $('.scrollBg').animate({
        backgroundPosition: '(' + (x * -1) + 'px ' + (y * -1) + 'px)'
    }, time, "swing", function() {
        moveBgAround();
    });
}
</script>
It’s that simple! You are now ready to experiment with the code I just created.
The X and Y values are the amount of pixels the background image will shift. He will not move that amount in pixel, but he will move to the generated coordinates.
If you would like to make it move more you can increase the number stated here:
var x = Math.floor(Math.random()*401);If you want to create a background image that is not a pattern but rather just a large texture, you have to an image with the following width and height: Take the number that you entered in the script (amount after random()) and add the width of the mask to it: that is your width. Same goes with the height.
This will allow the background to move around without being repeated.
Done!
If you have any questions or was inspirited to create different crazy effects: let me know in the comments below.
Happy developing!
